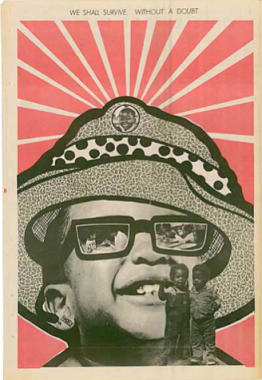
(Left: Emory Douglas poster, 1971)
Lesson Plan by Amanda E. Gross
National Visual Art Standards:
1, 2, 3, 4, & 5
Cognitive, affective, & psychomotor skills
Lesson Title: African and African-American Textiles
Lesson Objectives:
- Celebrate and present the validity of African and African-American textiles
- Introduce an historical perspective
- Why should we study African American art? Things to keep in mind, convey, and discuss: Peggy Cooper Cafritz, art collector and co-founder of the Duke Ellington Arts High School, believes art must be an integral part of society; “The cultures of minorities have always understood that, because in the absence of other things, like money or power, art has been one thing that we could be enriched by, cling to, support, celebrate.” Lisa Delpit in The Skin That We Speak, wrote “When instruction is stripped of children’s cultural legacies, then they are forced to believe that the world and all the good things in it were created by others.”
Vocabulary Words: textile, Kente (cloth from Ashanti weavers), patern, dye, culture, Africa, African, African-American, vertical, horizontal
Visual References:
Chris Spring and Julie Hudson’s Silk in Africa, John Gillow’s Printed and Dyed Textiles from Africa, Eva Wilson’s Islamic Designs, Virginia Hamilton’s The People Could Fly, Ashanti to Zulu; African Traditions (written by Margaret Musgrove, illustrated by Leo and Diane Dillon), and Faith Ringgold’s Tar Beach. All of these books have loads of textile patterns, and introduce historical topics such as African traditions, and segregation and slavery in America.
Materials: Visual references (listed above), paper or cloth to use as pattern surface, blocks or stamps in shapes and letters, dyes.
Assessment Strategies: Group discussion, observation during work time, students’ textiles, critique.
Lesson Progression:
1. Motivation: Introduce dye technique, and the colors and patterning of Islamic and North and West African patterns. Read the picture books aloud, and discuss any questions students have about the historical context. Have students look at the patterns and colors of the textiles in the picture books, and discuss:
Do the different cultures have different patterns/colors/symbols?
What shapes do you see? Is the fabric soft or rough?
What can you tell about how these people live?
2. Explore: Introduce the lesson steps and demonstrate how to make a pattern:
Draw a simple grid on the board (the same size that the students’ will be), with at least six squares.
Make a demonstration pattern, with a separate picture in each grid space. Ask students questions, such as Which stamps/colors should I choose?
Pass out papers or cloth to students.
Go through the grid-making steps again, as a class; Draw a few lines vertical and a few horizontal, so that the paper looks like a tic-tac-toe board or a checkerboard.
Students choose a stamp and a color for their first square, then create the same picture in alternating squares.
Students can be elaborate and imaginative as they want in making their patterns!
3. Reflection: Have students gather in a circle for a critique. Students share their textiles, explaining the colors, symbols, and patterns. Ask students what they learned, liked, and found challenging.


